click on the pictures to see enlarged photos
|
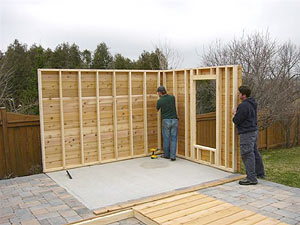
Erecting the Walls
A level floor is one of the most important aspects of assembly.
|
|
Erecting the Walls |
Adding the Gable Ends |
|
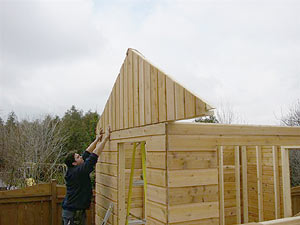
Adding the Gable Ends
|
|
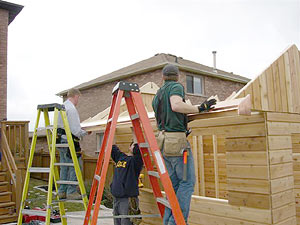
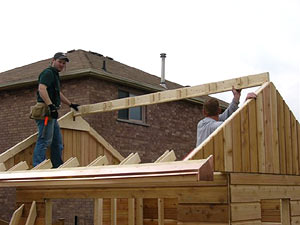
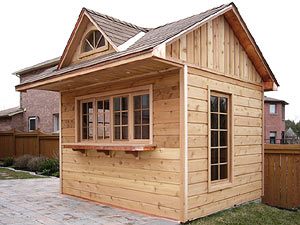
Attaching the Overhang Assembly
This photograph shows an overhang assembly for a cabana with a recessed front
wall. On the back wall, (and on structures without a recessed front wall), the
overhang assembly is attached directly to the top of the wall.
|
|
Attaching the Overhang Assembly |
Attaching the Overhang Assembly |
|
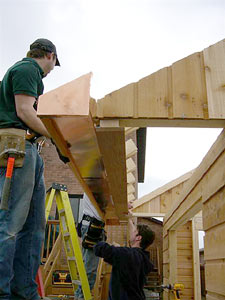
Attaching the Overhang Assembly
This pool cabana is shown with optional copper-clad soffit, end caps and drip
edge.
|
|
Dropping in the Ridge Beam
Note the matching slots on the ridge beam to assist in the placement of the
rafters.
|
|
Dropping in the Ridge Beam |

Laying in the Rafters |
|
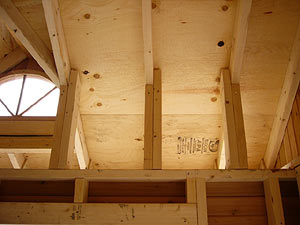
Laying in the Rafters
The rafter are simply laid into place, pulled up tight against the ridge beam
and fastened. Note the first 8" of the roof sheathing attached to the overhang
that will help hold the remaining roof sheathing.
|
|
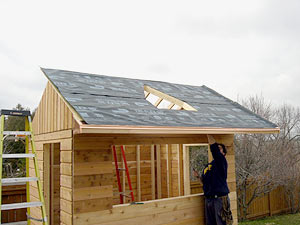
Applying Roof Sheathing
The roof sheathing is lain on the roof. The overhang assembly provides a lip
that holds the plywood sheets on the roof. If there is an optional dormer, the
sheathing is cut out around the dormer framing.
|
|
Applying the Roof Sheathing |
Installing the Dormer |
|
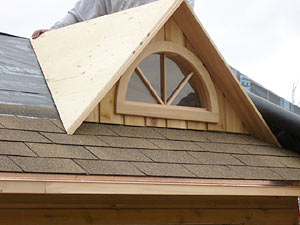
Installing the Dormer
The roof is shingled to the bottom of the optional dormer and the dormer is
attached to the roof.
|
|
Adding the Overhang Supports
The overhang supports are added between the top of the wall and rafters (only
required on pool cabanas and pool houses with additional front overhang).
|
|
Adding the Overhang Supports |
Final Finishing |
|
Final Finishing
The soffit and fascia is applied to the gable ends and the trim, overhang
decking, and corner caps installed. The doors, windows and other options are
all pre-assembled and/or pre-hung and need only be fastened into
their respective openings.
|
|
|


;)
;)
;)
;)
;)
;)
;)
;)
;)
;)